Riding Blog

This weblog at mikeuhl.com is the personal web site of Michael "Mike" Uhl. Entries to this weblog and web site represent my personal opinions. The site is not owned, operated, or affiliated with my employer or any organizations other than those owned and operated by Mike Uhl.

Photo (right): That's Lisa and me stopped along US 550, "The Million Dollar Highway," in southwest Colorado on our way north into Silverton, July 2017. 

Entries are copyright (c) Michael A. Uhl, as of date of posting.

You are welcome and encouraged to participate in the discussion on this site. Comments are owned by the poster. I reserve the right to remove any irrelevant, inflammatory, or otherwise inappropriate comments. Questions may be directed to me using the "Post a Comment" feature available on every blog page.

FYI: I ride a 2015 Harley-Davidson FLHTK Ultra Limited Special Edition.

Thank you and please enjoy my site!

Thursday
May302013

Dealing with squeaky muffler mounts 

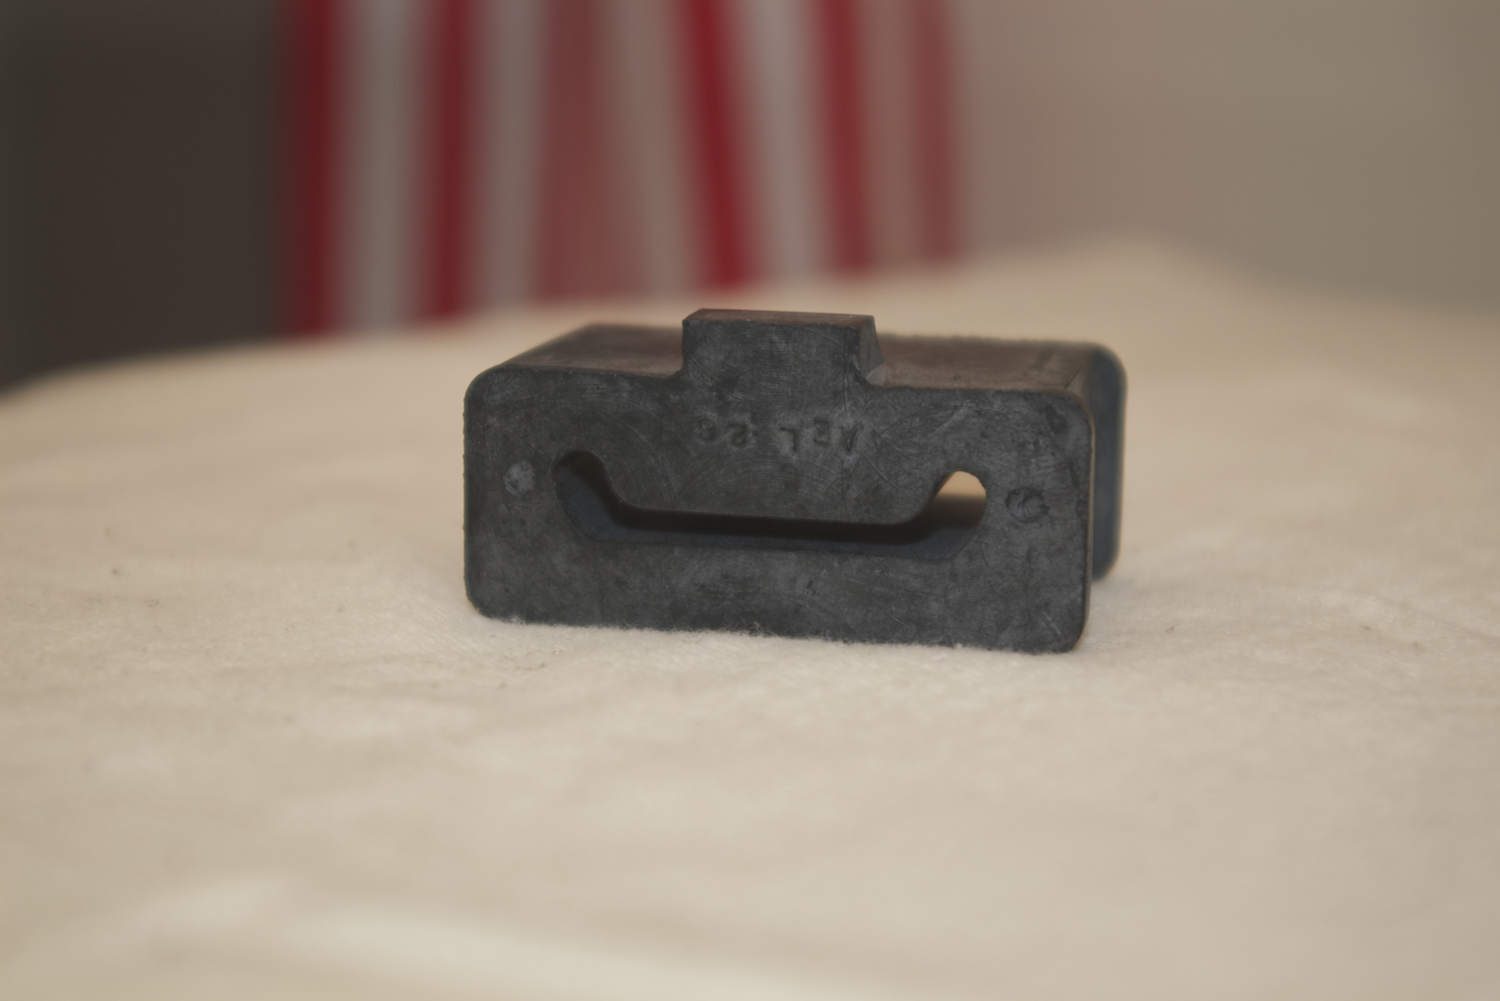
On touring models of Harley-Davidson motorcycles, such as my 2006 FLHTCI Electra Glide Classic, the two mufflers hang from a bracket buffered by a rubber pad. I've included a photo of a new rubber muffler mount at left. It's HD part number 65724-85 and it cost me $2.03 at the local Harley dealership.

I've been riding Harley touring bikes since 2000, about 135,000 miles since then, and I continue to be surprised how loudly these little rubber pieces can squeak when the vibrating exhaust pipe rubs the dried rubber against the metal retaining plate. 

You can temporarily remedy the racket by spraying some silicone lubricant on the rubber mount. However, at two bucks apiece and the 15 minutes you need to change each one, I recommend you keep them in stock in your garage and replace them at the first sign they've dried out.

To replace one of these rubber mounts, follow this procedure:

Step 1: Remove the saddle bag.

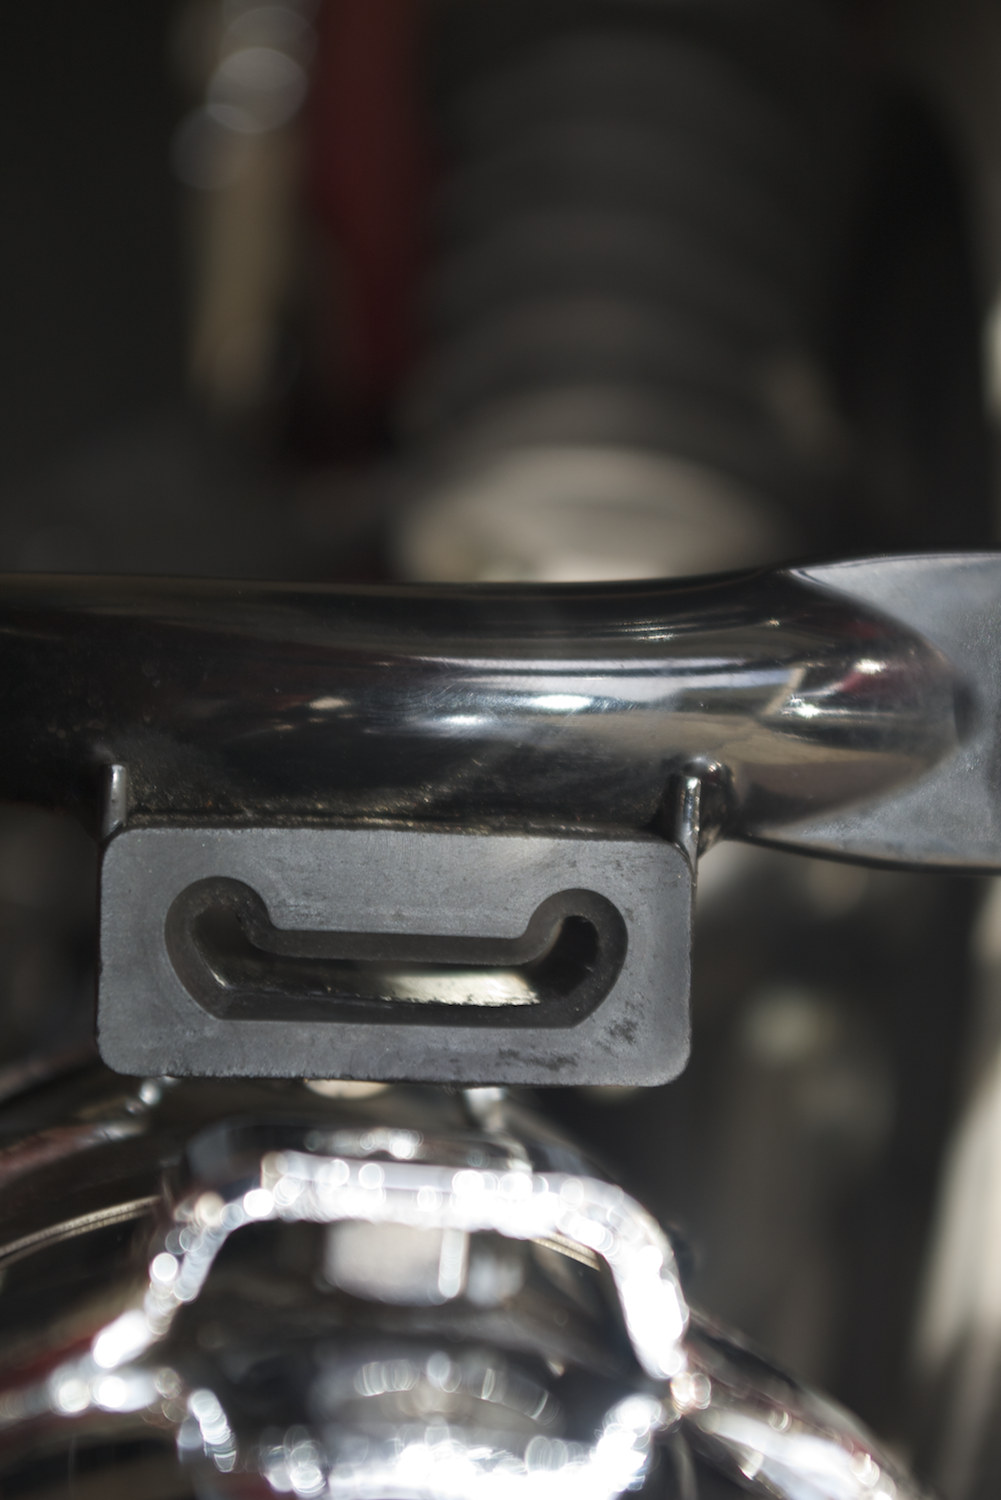
Step 2: Using a ratchet wrench with an extension bar to clear the saddle bag guard bars, remove the two fasteners holding the retaining plate and slide the plate out from the center of the rubber mount.

Step 3: Note on the rubber piece that there is a tab on the top of one end. This is important to note because you will want to push the rubber mount in the direction with the tabbed end leading. (As I discovered before I noticed this tab, it's difficult to push that end out of the metal frame.) I use a large flathead screw driver to push the mount out.

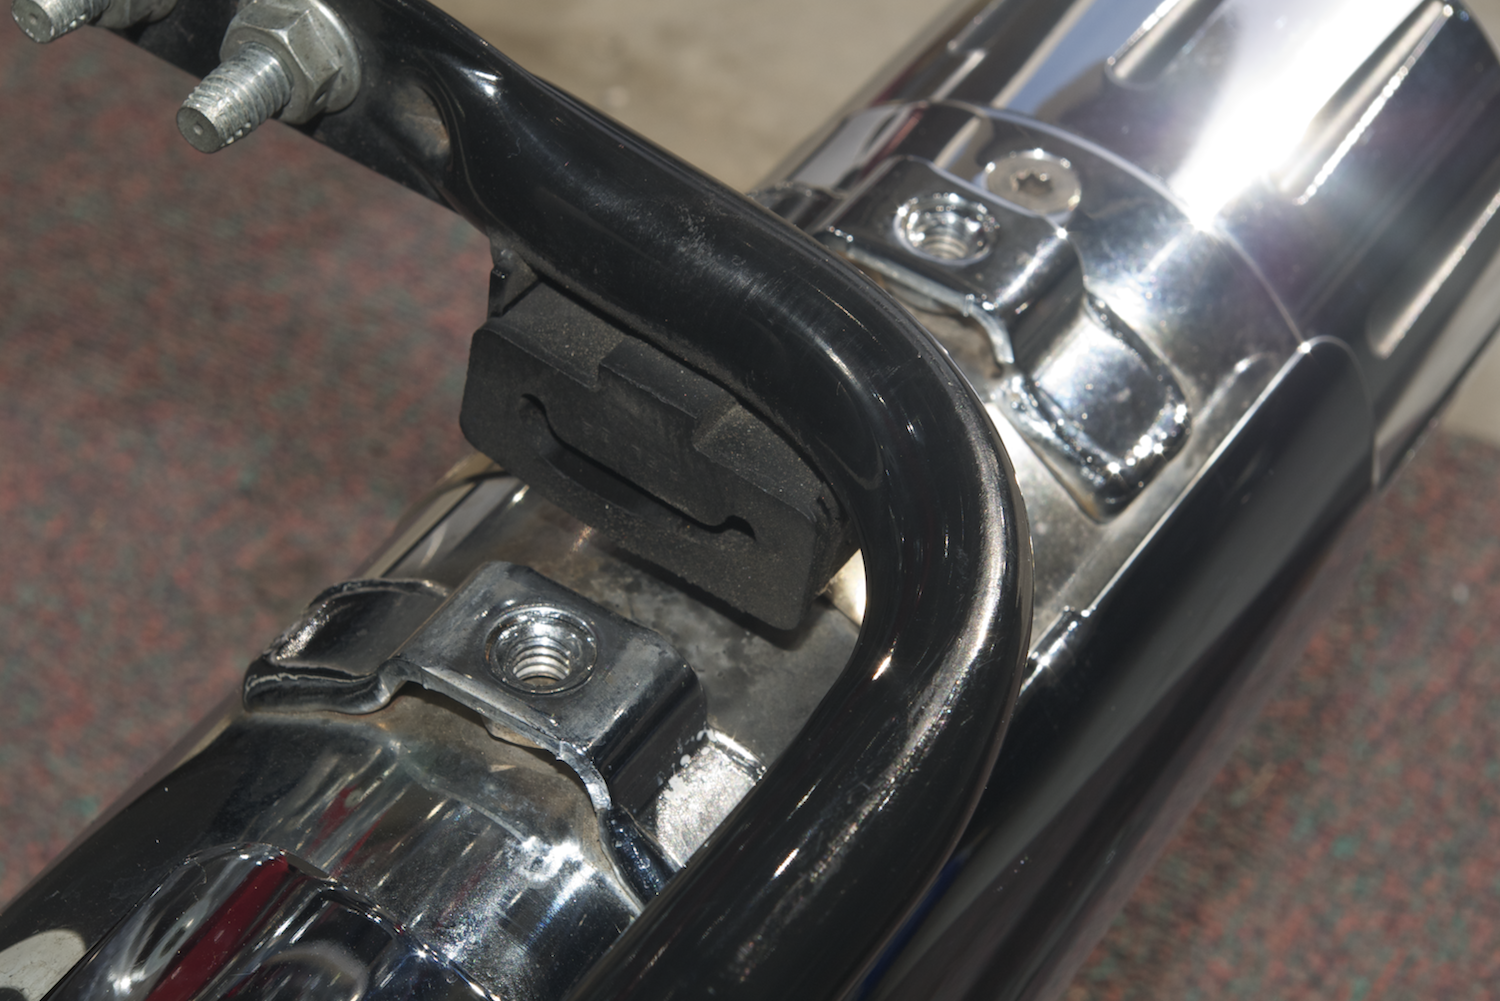
Step 4: Insert the new rubber mount, insert the mounting plate into the rubber piece, and use the two fasteners you removed earlier to reattach the muffler at the welded, threaded mount points to the metal retaining plate.

Step 5: Put your saddle bag back on and enjoy the quiet of the new rubber muffler mount.

Imagine how many poor riders have paid mechanics (or "technicians" as they liked to be called) big bucks to fix a mysterious squeaking noise at the back of their bike when all it took was 15 minutes of labor and a $2 part to eliminate. It's this kind of experience that motivates me to share with you what I've learned...often the hard (and expensive) way.

Keep the shiny side up!

-The Long Rider

Wednesday
May292013

Smoothing out a rough idle

First let me get a disclaimer out of the way: I am not a motorcycle mechanic. I don't even play one on TV. I've learned a great deal about maintaining my motorcycles from experience--good and bad, frequent experimentation, and from listening to the mechanics who have worked on my Honda and Harley-Davidson motorcycles over the years. Any advice or tips I give on my web site are for free and all responsibility for your outcomes lies with you. In other words, if you misinterpret something I write and damage your machine as a result, don't blame me.

As my esteemed colleagues at Motorcycle Consumer News (MCN) like to point out, restricted air flow is the most common (typical) constraint on motorcycle engine performance. In general, you want to permit air to flow as freely as possible into your cylinders, yet still filtering out contaminants. Thus, you want to use a clean filter with an optimum surface area. I use a K&N Air Filter that I wash and oil at regular intervals.

Regardless of the filter, if you own a bike long enough, you will very likely encounter a situation where the throttle body/air intake becomes partially clogged from gunk that manages to get past the filter or enters via fuel blow back from the cylinder heads. When this happens, the bike may idle roughly.

Recently, my Harley Electra Glide would idle OK until it got warm (not hot).* Once it got warm, the idle would become rough and the engine would often stall. One of the three guys at J&D Cycle in Morrisville, NC (I omit his name to protect his innocence :-) that works on my bike recommended I try throttle body cleaner. I'm passing this tip along to you because it worked very well.

By the way, I don't necessarily recommend the brand in the photo above. It just happened to be the one I first identified in a local auto parts store.

Step 1: Remove the air filter cover. (Photo 2, above right)

Step 2: Remove the air filter. (Photo 3, left)

Step 3: Spray throttle body cleaner into the air intake. The can's instructions say to do this with the engine off. My friendly mechanic suggested I do it with the engine running while at the same time twisting the throttle to open the intake. I followed the engine-on advice. You have to make your own choice on this one. (Photo 4, below)

Step 4: Put it all back together and enjoy an improved air flow (intake).

As always: keep the shiny side up!


*Once my bike's engine got hot, it idled fine.

Saturday
May112013

Reminder to clean and inspect your bike regularly

As a rider, you should behave more like an airplane pilot than an automobile driver when it comes to operating and maintaining your vehicle. For example, you should make pre-ride inspections a routine. Beyond these quick looks around your bike before you ride, you should also make it a habit to keep the bike clean. If it's dirty, you are more likely to miss damaged wires, cracked parts, etc. during your inspection. Also, when you clean you have a great opportunity to examine carefully the various parts you're cleaning.

Earlier this week, I was going over my bike with a micro-fiber cloth and spray wax when I found a cracked mounting bracket. (See photos.) My guess is that this crack resulted from hitting a particularly rough pot hole this spring. My left saddle bag contains my tools, first aid kit, rain suit, etc. It almost always has at least ten pounds or more of stuff in it. When I hit the pot hole, that weight was enough to snap this mounting bracket. I found a replacement on eBay and expect it to arrive in the next ten days or so.


People sometimes tease me about my obsessive maintenance habits, but then they and others marvel at how good this bike still looks at 82,500 miles!


Keep the shiny side up.

Sunday
Feb172013

Riding to Alaska - July 1 - 27, 2013

Mitch Mitchell and I held our second ride planning meeting yesterday. The first one was so long ago that this one feels like the actual kickoff activity for the ride. Now the whole project is beginning to feel real and my excitement is starting to build.

A ride of this length and into this kind of remote territory requires lots of planning. And it's also a good idea to learn from others' experience. Mitch and I agreed that we want to consult experts on the matter and we're starting with Dr. Gregory W. Frazier who has written a book titled Alaska by Motorcycle. He's ridden to Alaska more than a dozen times, including all the way to Prudhoe Bay (Deadhorse, AK). Because Dr. Frazier's book is a bit outdated, we will also be referring to other well-known guides, such as The Mile Post.

Our plan is to ride to Fairbanks and then north on the Dalton Highway (aka Prudhoe Bay Haul Highway) with photos at the Arctic Circle sign, illustrated on the cover of Dr. Frazier's book. (Refer to the illustration, right.) We then have to ride another 50 miles or so to get gas at Coldfoot and then turn around.

Our goal is to complete the ride in four weeks with four days in reserve. That is, I will plan to be traveling though July 31, but we will target July 27 as our return date.

I will describe the details of our planning over the next four and a half months and blog from the road in July--where possible. 

Keep the shiny side up!

The Long Rider

Sunday
Oct072012

PGR Presents Flag from Afghanistan & Iraq to Ray Price


PGR flag gift to RayPrice smThe Raleigh Chapter of the Harley Owner's Group (HOG) held its October general meeting at the American Legion Raleigh Post #1 on Lee Road. At the meeting, my friend and fellow rider Mike Russo presented Ray Price a very special version of the Patriot Guard Riders flag. Shepherded by Mr. Russo, the PGR flag was flown over US military posts in Afghanistan and Iraq over the last 1-2 years and signed by many of the service members at those posts. Mr. Price, owner of Ray Price Harley Davidson on South Saunders Street in Raleigh, plans to hang the flag prominently in his store. Stop by and check it out.

In the accompanying photo, from left to right: Mike Russo, Ray Price, me (Mike Uhl), Steve Romo, and another PGR member whose name I have forgotten. (I had just met him for the first time that night.) 


Photo credit: Jake Sanok, Chapter Photographer, Raleigh HOG